
Installation of Kali Linux Distribution
1. First, plug the USB drive into the respective computer that Kali should be installed upon and proceed to boot to the USB drive. Upon successful booting to the USB drive, the user will be presented with the following screen and should proceed with the ‘Install’ or ‘Graphical Install’ options.
This guide will be using the ‘Graphical Install’ method.

Kali Linux Boot Menu
2. The next couple of screens will ask the user to select locale information such as language, country, and keyboard layout.
Once through the locale information, the installer will prompt for a hostname and domain for this install. Provide the appropriate information for the environment and continue installing.

Set Hostname for Kali Linux

Set Domain for Kali Linux
3. After setting up the hostname and domain name, the root user’s password needs to be set. DO NOT FORGET THIS PASSWORD.

Set Root User Password for Kali Linux
4. After setting the password is set, the installer will prompt for time zone data and then pause at the disk partitioning.
If Kali will be the only operating on the machine, the easiest option is to use ‘Guided – Use Entire Disk’ and then select the storage device you wish to install Kali.

Select Kali Linux Installation Type
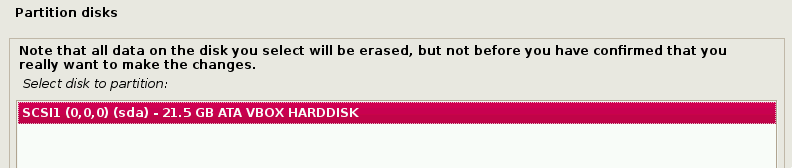
Select Kali Linux Installation Disk
5. The next question will prompt the user to determine the partitioning on the storage device. Most installs can simply put all data on one partition though.

Install Kali Linux Files in Partition
6. The final step with ask the user to confirm all changes to be made to the disk on the host machine. Be aware that continuing will ERASE DATA ON THE DISK.

Confirm Disk Partition Write Changes
7. Once confirming the partition changes, the installer will run through the process of installing the files. Once it is completed, the system will want to setup a network mirror to obtain future pieces of software and updates. Be sure to enable this functionality if you wish to use the Kali repositories.

Configure Kali Linux Package Manager
8. After selecting a network mirror, the system will ask to install grub. Again this guide is assuming that Kali is to be the only operating system on this computer.
Selecting ‘Yes’ on this screen will allow the user to pick the device to write the necessary boot loader information to the hard drive to boot Kali.

Install GRUB Boot Loader
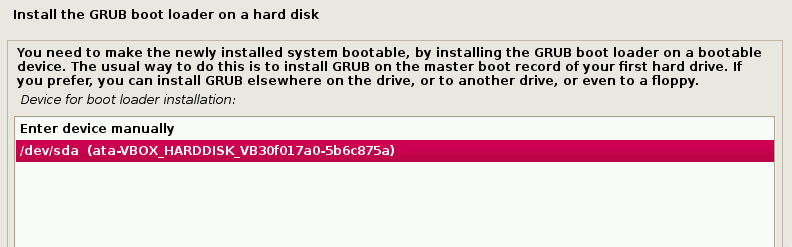
Select Partition to Install GRUB Boot Loader
9. Once the installer finishes installing GRUB to the disk, it will alert the user to reboot the machine to boot into the newly installed Kali machine.

Kali Linux Installation Completed
10. Since this guide installed Enlightenment as the Kali desktop environment, it will likely default boot into a shell.
At this point, Kali is successfully installed and ready to be used! Upcoming articles will walk through the tools available within Kali and how the can be utilized to test the security posture of hosts and networks. Please feel free to post any comments or questions below.


0 Comments